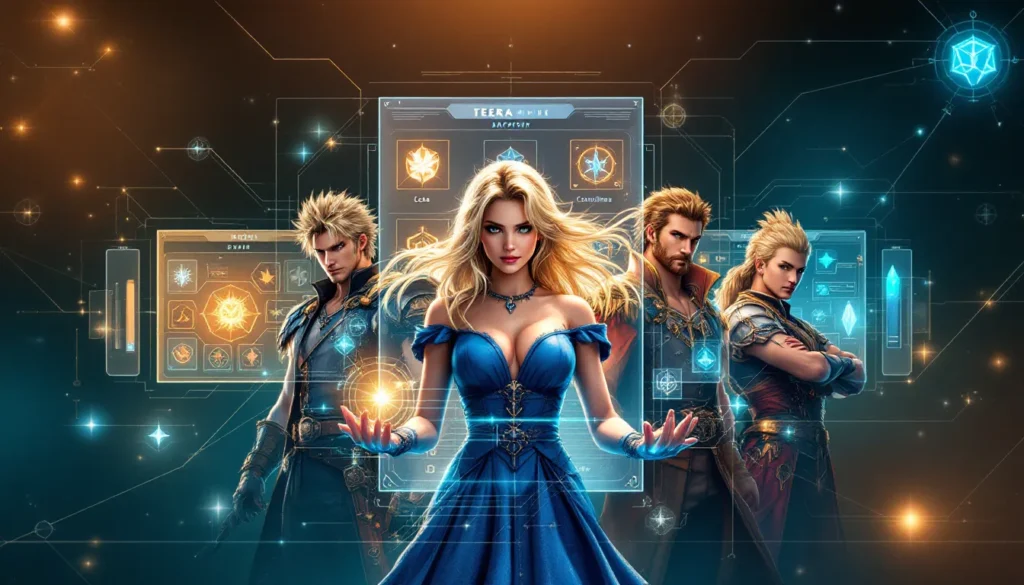
Final Fantasy VI stands as one of gaming’s most beloved JRPGs, and a huge part of that legacy is its cast. Unlike many RPGs where you’re stuck with a fixed party, FFVI lets you field any combination of its 14 playable characters. That flexibility is both a gift and a headache, especially since each character brings totally different mechanics, story weight, and combat philosophy to the table. Whether you’re running through the game for the first time or optimizing a speedrun, understanding what each character brings and how they synergize matters. This guide breaks down every playable character in Final Fantasy VI, their abilities, best use cases, and how to build teams that actually work together.
Table of Contents
ToggleKey Takeaways
- Final Fantasy VI features 14 playable characters with diverse mechanics, allowing flexible team composition where no character is truly useless, just differently useful depending on encounters and build strategies.
- Terra, Celes, and Strago serve as the primary mages with distinct roles—Terra excels as a balanced damage/healer, Celes dominates through her Runic ability against magic-heavy bosses, and Strago gains power through learning Blue Magic (Lore) spells from enemies.
- Physical attackers like Sabin (martial arts Blitzes), Edgar (technology-based Tools), and Locke (thief with Steal mechanics) each bring unique damage approaches; mastering their mechanics—especially Sabin’s input commands—separates casual from optimized play.
- Final Fantasy VI character synergies multiply when you pair magic-boosting espers with mages, Attack Power relics with fighters, and fast characters with Speed-enhancing gear, creating thousands of viable team combinations beyond any single meta.
- Specialized characters like Relm (Sketch ability to copy enemy moves), Gau (Rages that mimic monster abilities), and Setzer (RNG-based Slots) add unpredictability and chaos, rewarding players who understand niche mechanics over those seeking straightforward optimization.
- The game’s greatest strength lies in its flexibility: understanding each character’s narrative arc and mechanical depth allows players to build emotionally resonant teams that feel personal rather than purely optimized, making replays feel fresh and engaging.
Understanding The Diverse Roster Of Final Fantasy VI
FFVI’s cast is refreshingly different from what you’d expect. There’s no traditional “hero’s party”, instead, you get 14 characters who were genuinely torn from their lives and thrust into a world-ending conflict. This diversity is baked into the design. Some characters excel at pure offense. Others control the battlefield through status effects or support. A few are niche specialists. The game doesn’t force you into a meta either: it rewards understanding the tools at your disposal and matching them to encounters.
The character system relies on different mechanical frameworks: magic-users rely on spell pools and equipment, physical fighters depend on weapons and abilities, and a few hybrids blend both. Early in the game, your options are limited, you’ll start with Terra and gradually pick up Locke, Edgar, and others. But once you hit the World of Ruin, you’re managing a larger roster and deciding who actually makes the cut. That’s where knowing the strengths and weaknesses of each character becomes critical. Some shine in endgame content like the Colosseum or Kefka’s Tower, while others are situational picks. The beauty is that no character is truly useless, just differently useful.
Terra Branford: The Half-Esper Protagonist
Terra is your entry point into FFVI’s world, and she carries the narrative weight that demands. She’s half-human, half-Esper, a heritage that defines her character arc and combat abilities. Unlike other protagonists, Terra isn’t the “chosen one” in a traditional sense: she’s someone who stumbles into destiny and grapples with her identity throughout the game.
Story Significance And Character Arc
Terra starts the game controlled by Gestahl’s Empire, forced to suppress her Esper heritage through slave crowns. Her character arc is about reclaiming agency, discovering that her Esper powers aren’t a curse but part of who she is. By the World of Ruin, she’s one of the few characters who explicitly grapples with the psychological toll of the world’s destruction. Her ending varies depending on player choices, which was uncommon for JRPGs in 1994. This narrative flexibility made her feel real in a way many characters didn’t.
Combat Abilities And Best Builds
In combat, Terra has access to Magic through learned spells and the unique Morph ability. Morph transforms her into a more powerful form for several turns, boosting her spell power and damage output significantly. This ability alone makes her valuable in drawn-out fights.
Her spell list includes classics like Firaga, Blizzaga, Thundaga (Tier 3 elemental magic), and crucially, healing spells like Cure and Raise. Terra functions as both a damage dealer and backup healer, which is why she remains relevant throughout the entire game.
Best builds for Terra:
- Magic-focused build: Prioritize Magic Power through equipment and espers. Pair her with espers that boost Magic (like Kefka’s stat boost or Bahamut for Magic+). Stack spell power relics and use her as your primary mage.
- Balanced build: Use Morph for burst damage on bosses while maintaining spell flexibility. This works best with espers offering both Magic and survivability.
- Support variant: Equip her with healing-heavy spells and Raise to keep the party alive. Works well in longer dungeons where attrition matters.
Terra’s growth in Magic Power is solid but not exceptional, so esper selection matters more than most characters. Gear her with items boosting Magic Power and consider the Maduin esper for an all-around boost.
Locke Cole: The Rogue With A Heart
Locke is the party’s thief and one of the game’s most likable characters. He’s skilled with blades, faster than most of the cast, and carries the weight of his past, specifically, a tragic romance that drives much of his personal story. Unlike many RPG thieves who are one-dimensional rogues, Locke has genuine depth.
Thieving Mechanics And Steal Mastery
Locke’s signature ability is Steal, which lets him pilfer items from enemies without fail. This isn’t just a flavor mechanic: it’s genuinely powerful. Boss fights often drop valuable items if you steal from them, sometimes better rewards than winning the fight normally. Learning what to steal from specific enemies is part of the metagame.
He can equip a range of weapons (swords, daggers, claws) and has decent physical attack power. His Mirage Vest relic is one of the few ways to grant enemies a chance to miss, which becomes relevant in specific encounters. Locke’s speed is one of his defining traits, he naturally acts faster than most party members, letting him control turn order in important fights.
Specific steal value:
- Boss fights: Stealing from bosses like Ultros yields high-tier items or elemental rods that you’d struggle to acquire otherwise.
- Rare monster encounters: Certain rare encounters hold unique items. Knowing what to steal makes the difference between “good equipment” and “best-in-class gear.”
- Relics and equipment: Locke can steal relics that provide defensive or offensive boosts, skipping entire stretches of the economy grind.
Character Development And Relationships
Locke’s story is intertwined with Rachel, a woman he loved who was turned into a Zombie by the Esper Atma. His guilt over her fate and his attempts to “fix” what happened shape his worldview. Unlike characters who have simple motivations, Locke carries genuine trauma.
His relationship with Celes is one of the game’s emotional anchors. As she grapples with her heritage and identity, Locke becomes her support, and the game makes you choose moments to lean into or ignore their chemistry. This player agency in relationship development was uncommon for 1994.
Locke remains a solid physical attacker throughout the game. Pair him with fast weapons, keep his Speed up, and watch him control turn order while applying pressure. He’s not flashy like some characters, but consistency and reliability make him invaluable.
Celes Chere: The General Turned Rebel
Celes starts the game as a general in Gestahl’s military, a soldier serving the oppressive Empire. Her character arc is about breaking free from that identity and finding agency. She’s a powerful magic user, physically capable fighter, and one of the few characters whose position in the party shifts the game’s power dynamic.
Magic Affinities And Combat Strategies
Celes has natural affinity for Magic with a starting Magic stat higher than most physical attackers. She learns spells through level-up progression and esper-induced learning. Her spell list includes heavy-hitter spells like Meteor and Ultima, plus healing-focused magic like Regen and Reraise.
Her signature ability is Runic, which allows her to absorb magic spells cast in her direction, both enemy spells and her allies’ magic. This is incredibly powerful against magic-heavy bosses. A boss casting Thundaga every turn? Runic absorbs it, damaging the boss and strengthening Celes. This mechanic makes her uniquely valuable against specific encounter types.
Celes is also one of the few characters naturally able to equip heavy armor and weapons without stat penalties. She can be built as a heavy physical attacker or a magic powerhouse, her versatility is rare.
Best Celes builds:
- Runic-focused: Maximize her Magic Defense and speed. Let her absorb spell spam from bosses. Pair with espers that boost Magic or defense.
- Magic damage: Equip her with Magic-boosting espers like Maduin or Tritoch. Stack Magic Power relics. She becomes a competitive damage dealer.
- Hybrid tank: Use her high HP pool, strong armor options, and healing spells to keep the party alive while dealing respectable damage.
Leadership Role In The Second Half
In the World of Ruin, Celes takes on a critical leadership role. The party finds her on the Floating Continent, and she becomes the emotional and tactical center of the resistance against Kefka. Her search for hope, literally and figuratively, drives the second half’s narrative.
Celes is the only character who can be used in the opera house scene, a story-critical sequence that shapes the entire second act. Her presence in that scene isn’t optional lore: it’s central to understanding the party’s motivation. This makes her more than just a playable character, she’s woven into the fabric of the story.
Edgar Roni Figaro: The Tech-Savvy King
Edgar is the king of Figaro Castle, and his gimmick is technology, a stark contrast to the magic-heavy fantasy world he inhabits. He’s charming, capable, and brings a mechanical edge to party composition that no other character matches. His character arc involves learning that ruling a kingdom means making impossible choices.
Tools And Gadgets: Drills, Chainsaws, And More
Edgar’s Tools are his defining mechanic. Rather than learning magic, Edgar uses items to unleash special effects in combat. His arsenal includes:
- Drill: Piercing attack that bypasses defense. Useful against heavily-armored enemies.
- Chainsaw: High physical damage with a gamble mechanic, it hits twice, but damage output varies. Risky but rewarding.
- Flash: Blinds all enemies, reducing their hit rate. Invaluable for survival against physical enemies.
- Bolt: Lightning damage to a single enemy. Mid-tier damage but reliable.
- Bio Blast: Poison damage to all enemies. Useful for chipping away at grouped enemies over time.
- Noiseblaster: Confuses enemies. A status effect that can trivialize certain encounters.
- Air Anchor: Massive damage that also scales with remaining boss HP. Incredibly powerful in endgame fights.
Tools scale with his Attack Power stat, not Magic, making Edgar a physical fighter even though his technological bent. He uses conventional weapons like swords and spears alongside his tools.
Later in the game, Edgar gains access to Sabin’s Blitzes through the plot, specifically, he can use Pummel and Aura Bolt in certain contexts. This hybrid capability makes him more flexible as the game progresses.
Edgar’s physical attack power is among the highest in the party. Equip him with powerful weapons, boost his Attack Power through espers and gear, and watch him output consistent damage. His tools add utility without sacrificing damage potential, a rare combination.
Sabin Rene Figaro: The Martial Arts Master
Sabin is Edgar’s twin brother, but where Edgar relied on technology, Sabin trained in martial arts. He’s a monk-style character who uses his fists and the Blitz ability system to deal devastating damage. His character arc involves choosing his own path rather than the one laid out for him as a prince.
Blitzes And Special Techniques
Sabin’s signature mechanic is Blitzes, special martial arts techniques activated by inputting command sequences. Think of them as Street Fighter-style moves. Each Blitz requires a specific directional input sequence, and pulling it off grants unique effects:
- Pummel: Forward, Back, Forward + Attack. Hits an enemy repeatedly. Damage scales with hits landed.
- Aura Bolt: Circles left, then right + Attack. Damage to one enemy plus HP recovery to Sabin. Incredibly valuable for survival.
- Suplex: Up, Down + Attack. Grabs an enemy and slams them. Works on most enemies and bosses.
- Fire Dance: Down-right, Up-left + Attack. Fire damage to all enemies. Your first AOE Blitz.
- Mantra: Left, Right, Left, Right + Attack. Healing and protection spell. Sabin heals the party and reduces incoming damage.
- Soul Throw: Right, Down-left + Attack. Long-range energy attack. Useful when Sabin can’t reach enemies.
- Raging Fist: Quarter-circle + Attack. Massive single-target damage. Available later in the game.
Blitzes don’t consume resources like MP, they’re simply inputs. This makes Sabin a perpetual threat in fights: he never runs out of ammunition. Mastering Blitz inputs is essential to using Sabin effectively. Many casual players skip Sabin because they find the input system tedious, but optimized players treat him as one of the strongest characters in the roster.
Sabin is a pure physical attacker with no magic affinity. Equip him with espers offering physical boosts like Ifrit or Typhon. Stack Attack Power gear. Maximize his Speed so he acts frequently, every additional turn is another Blitz opportunity. In endgame content, Sabin with optimized inputs becomes a damage-dealing machine.
Shadow: The Mysterious Ninja
Shadow is an optional recruitable character, you can play through most of the game without him, but he’s available if you know where to find him. He’s a ninja with a mysterious past, a disarming personality, and access to the Throw ability. His combat style emphasizes speed, single-target damage, and evasion.
Shadow’s signature ability is Throw, which lets him hurl weapons or items at enemies. The items determine the effect: throwing Shurikens deals physical damage, throwing Daggers applies status effects, throwing Grenades damages all enemies. This flexibility makes him valuable in varied encounters. Unlike traditional throw mechanics that consume items, Shadow’s Throw ability is resourced, each item counts, but he can find more.
He has access to ninja magic like Smoke Bomb (escape ability) and Shuriken attacks. His physical attack power is decent but lower than dedicated physical fighters. But, his speed stat is exceptional, often acting first in turn order.
Shadow’s personal questline involves his past: he’s a mercenary with a dark history, hiring himself out to the highest bidder. A dog traveling with him becomes an emotional anchor for his character. Whether his survival matters depends on your choices at a critical juncture.
Shadow is niche, you don’t need him, but if you enjoy hit-and-run tactics and unpredictable item throws, he’s fun. Players chasing optimal setups often skip him in favor of more straightforward options. That said, his Throw mechanics are unique, and his speed makes him valuable if you’re planning around turn order.
Gau: The Feral Child
Gau is a feral child who was abandoned and raised by creatures on the Veldt, a wild grassland area. He’s a damage dealer with a completely unique mechanic: Rages. When Gau uses his Rage ability, he assumes the characteristics of any monster he’s previously encountered, copying their abilities and stats. This makes him incredibly flexible but requires setup and knowledge.
Rages And Monster Abilities
Gau’s combat revolves around Rages. When activated, Gau becomes a specific monster type and attacks autonomously using that monster’s moveset. He can’t be controlled while in Rage mode, he’ll attack based on the monster’s natural behavior. This unpredictability is both a strength and a weakness.
High-value rages include:
- Typhon: Casts Meltdown repeatedly. Massive AOE damage. One of the strongest offensive rages available.
- Storm Dragon: Uses wind-based attacks. Strong physical damage output.
- Atma Weapon: Powerful physical attacks and occasional healing. Available late-game.
- Stray Cat: Lower-tier rage, but early accessibility teaches you how the system works.
Gau can learn rages by encountering monsters on the Veldt and using the Leap ability. This requires intentional grinding, running to the Veldt and fighting specific monsters to catalog them. Players who invest this time gain access to a huge variety of effects. Players who skip this slog miss out significantly.
Gau’s physical stats are mediocre outside of Rage, so you’re not using him as a conventional attacker. His value is entirely dependent on the rages you’ve cataloged. Early-game, he’s underwhelming. Late-game, with a diverse rage library, he becomes competitive.
Gau also learns Stray and Back Row positioning, making him a decent physical threat outside of Rage mode. His HP growth is solid, giving him survivability even when not in Rage. That said, most optimizers treat Gau as a specialist, valuable in specific situations but not a core team slot.
Setzer Gabbiani: The Gambler With A Dream
Setzer is an independent gambler who joins your party after certain story events. He fights with Dice and Cards, using chance-based abilities. His character arc involves letting go of revenge and learning to trust others. He brings a zany energy to the party’s dynamic.
Setzer’s primary ability is Slots, which triggers a random effect based on what symbols line up:
- Seven: Massive AOE damage to all enemies and healing to all allies. The jackpot outcome.
- Airship: Damage to all enemies, minor healing.
- Chocobo: Damage to all enemies.
- Bar: Physical damage to one enemy.
Slots is fully RNG-dependent, making Setzer unreliable for competitive play but fun for casual runs. Some players invest in frame-perfect timing or save-scum to control slot outcomes. Others embrace the chaos.
Setzer also equips Dice and Cards as weapons. His physical attack power is lower than dedicated fighters, but his Slots ability compensates by potentially hitting all enemies at once. Unlike Sabin’s controlled Blitzes or Edgar’s reliable Tools, Setzer is pure gamble, fittingly thematic.
Setzer joins late in the game and doesn’t integrate as deeply into the narrative as other characters. He’s a capable damage dealer and a fun personality, but story-wise, he’s less critical. Mechanically, he’s viable endgame but replaceable. Many players keep him for the character moments and thematic consistency rather than raw optimization.
Strago Magus: The Blue Mage Scholar
Strago is an elderly mage and father-figure to Relm. He specializes in Blue Magic, the ability to learn enemy spells and cast them himself. This makes him one of the most flexible mages in the party, with access to a huge variety of effects depending on what you’ve encountered.
Blue Magic And Lore Abilities
Strago’s Lore ability lets him learn spells from enemies. When an enemy casts a spell on him or his party, Strago has a chance to learn it. High-value Lore spells include:
- Tsunami: Massive water damage to all enemies. Learned from specific aquatic enemies.
- Big Guard: Grants protective buffs to the entire party. Game-changing utility.
- Quake: AOE earthquake damage. Useful against grouped enemies.
- Roulette: Random damage to all enemies. Unreliable but devastating when it lands.
- Force Field: Grants protective effects. Less powerful than Big Guard but still valuable.
Unlike traditional mages who learn spells through level-up, Strago’s spellbook grows dynamically as you encounter new enemies. This encourages exploration and experimentation. Players who engage with this mechanic unlock powerful utility. Players who rush through dungeons miss out on key spells.
Strago also has conventional Magic spells learned through espers. His baseline magic includes healing (Cure, Cura) and elemental offense (Fire, Blizzard, Thunder). Combined with Lore, he becomes one of the most versatile mages.
Strago’s Magic Power grows decently, but he benefits more from esper-based boosts and Magic Power relics than Terra or Celes. Late-game, with a full Lore library, he becomes incredibly valuable. His age means lower physical stats, so you’re not using him as a hybrid, pure magic user.
Strago is underrated by casual players and overrated by optimizers. Casual players see him as “old guy mage,” not realizing his Lore potential. Optimizers treat him as blue magic’s swiss army knife. The truth is somewhere between: he’s excellent if you engage with the Lore system, solid if you ignore it.
Relm Arrowny: The Artistic Powerhouse
Relm is a young artist and Strago’s granddaughter. She’s a mage with a unique twist: her Sketch ability lets her copy enemy abilities and use them on your behalf. This makes her one of the most overpowered characters if you understand the mechanics. She’s also a crucial character emotionally, as her relationship with her grandfather frames the second half’s narrative.
Sketch And Control Abilities
Relm’s signature ability is Sketch, which randomly copies an enemy’s ability and uses it. Unlike Gau’s uncontrolled Rage or Setzer’s RNG-based Slots, Sketch is consistently powerful because most bosses have useful abilities. Copying a boss’s healing move to use on yourself? Incredible. Copying their damage ability to use on them? Hilarious and powerful.
Relm also has Control, which lets her take direct control of an enemy and command their actions. This is less useful than Sketch in most situations, but there are niche encounters where forcing an enemy to use specific moves trivializes the fight.
Relm learns magic normally like other mages: casting spells through esper learning. Her Magic Power isn’t exceptional, so she’s not a primary damage dealer through spells. But, Sketch bypasses damage entirely, you’re leveraging enemy abilities, not your own stats.
The meta surrounding Relm centers on discovering which enemies have the most broken abilities to Sketch. Bosses often have powerful moves that are incredible when flipped against them. Early-game, Sketch is unreliable because you haven’t encountered many enemies. Late-game, Relm becomes a powerhouse.
Relm’s narrative role is as important as her mechanical role. Her arc involves self-worth, artistic talent, and family. Her personal quest with Strago deepens the story’s emotional weight.
Mog: The Dancing Dragoon
Mog is a moogle, a cute, furry creature central to Final Fantasy lore. He’s available as a recruitable character late-game and brings a unique mechanic: Dance. He’s also one of the few characters who can equip spears, making him a dragoon-style hybrid fighter.
Dance Abilities And Dragon Lances
Mog’s Dance ability is similar to Sabin’s Blitzes but visually themed around dancing. Each Dance has random effects but tendencies based on the type:
- Water Rondo: Healing and water-based buffs.
- Earth Rondo: Earth-based damage.
- Wind Rondo: Wind-based damage to all enemies.
- Fire Rondo: Fire-based damage.
- Forest Rondo: Nature-based healing and buffs.
Dances are partially random, making Mog unreliable for competitive optimization but fun for casual play. He synergizes with the Dragoon class mechanic, equipping spears and the Jump ability to deal massive damage while avoiding damage (by being in the air during enemy attacks).
Mog’s physical attack power is middling, and his Magic Power is below average. He’s not a dedicated damage dealer or mage. Instead, he’s a support character with decent survivability and utility through Dances. His HP growth is solid, making him surprisingly tanky.
Mog also has a story arc: he’s lost his memories and traveling with you to recover them. His personal quest is touching and worth experiencing, even if he’s not mechanically essential.
Mog is niche. He’s fun and thematic, but most optimizers skip him in favor of characters with more consistent mechanics. If you value character personality and thematic cohesion over pure damage output, Mog’s a great choice.
Umaro: The Forgotten Berserker
Umaro is a yeti, a large, furry creature living in mountains. He’s an optional recruitable character with a simple gimmick: he’s a Berserker who attacks automatically without player control. Unlike Gau’s Rages or Setzer’s Slots, Umaro doesn’t trigger a special ability. He just… attacks. Repeatedly. Uncontrollably.
Umaro’s physical attack power is among the highest in the game. Equip him with strong weapons and relics boosting Attack Power, and he’ll output impressive damage. But, you can’t control what he does, he’ll attack the same enemy repeatedly or switch targets based on AI logic.
Umaro’s character is minimal. He doesn’t have a personal quest or story arc. He’s recruited through plot necessity and functions as a damage dealer. Most players treat him as a convenience character, useful when you want pure offense without thinking.
In terms of actual strength, Umaro is solid. His damage output rivals Sabin and Edgar. The downside is inflexibility, if you need him to focus fire on a specific enemy or hold back to conserve resources, you’re out of luck. He does what he wants.
Umaro is the definition of niche. Speedrunners and optimizers often skip him. Casual players who want a powerful berserker character appreciate his simplicity. Mechanically, he’s less interesting than other characters, but his damage output is legitimate.
Team Composition And Party Synergies
Now that we’ve covered individual characters, let’s talk about building teams that work together. FFVI’s flexibility means you can theoretically use any 4-character combination. Practically, some synergies are stronger than others.
Building Optimal Teams For Different Challenges
The game naturally divides into phases: early-game (before the World of Ruin), mid-game (exploring with your growing party), and late-game (endgame content, Kefka’s Tower, the Colosseum).
Early-game teams (before World of Ruin):
You don’t have full character choice initially. You’ll use Terra, Locke, and Edgar by default, then gradually gain access to others. Your early team is essentially forced until you hit Zozo.
Once you have flexibility, aim for:
- One dedicated mage (Terra or Celes) for healing and damage
- One physical attacker (Locke, Edgar, or Sabin) for consistent DPS
- One utility character (Edgar for tools, Sabin for Blitzes)
- One flex slot for whatever suits current challenges
This covers damage, healing, and utility. Avoid stacking too many physical attackers early: you need healing coverage.
Mid-game synergies:
By the Floating Continent, you have most characters available. Start building around specific synergies:
- Magic-heavy team: Terra + Celes + Strago + healer. Multiple mages output AOE damage quickly, trivializing mob groups.
- Physical-focused team: Edgar + Sabin + Locke + healer. Pure damage from multiple angles, fast turn order.
- Balanced team: One mage (Celes or Terra) + two physical attackers (Edgar and Sabin) + healer (Strago or Terra). Covers all bases.
Late-game optimization (World of Ruin and beyond):
Once you have full roster access and can farm for the best equipment and espers, team building becomes more calculated. The Colosseum and Kefka’s Tower reward specific strategies.
Recommended late-game team:
- Primary DPS: Sabin (with full Blitz mastery) or Edgar (with high-tier tools)
- Secondary DPS: Celes (magic or physical) or Locke (physical)
- Utility/Magic: Relm (for Sketch cheese) or Strago (for Lore coverage)
- Healer/Support: Terra (with healing spells) or Celes (with Runic)
This configuration provides:
- High damage output (Sabin + secondary DPS)
- Flexibility (Relm/Strago for utility)
- Survivability (healer + tank positioning)
Synergy considerations:
Esper selection matters enormously. If your team is magic-heavy, stack espers offering Magic boosts (Maduin, Tritoch). Physical teams benefit from Attack Power boosts (Ifrit, Typhon).
Relics amplify synergies. Combining Genji Glove (equip two weapons) with dual-weapon users like Celes or Locke multiplies damage. Pairing Hermes Boots (speed boost) with fast characters ensures they act first.
recent discussion on gaming forums about Final Fantasy 14 Classes highlights how character selection profoundly impacts team composition, the same principle applies in FFVI.
Specific challenge setups:
For tough boss fights, consider:
- Heavy magic bosses: Celes with Runic + Strago for utility + Terra for heals
- Physical bosses: Edgar with high-attack tools + Sabin for burst damage + Locke for utility
- Hybrid bosses: Balanced team with multiple damage types and strong healer
The beauty of FFVI is that these are recommendations, not requirements. You can beat the game with unconventional teams if you understand what each character brings. The meta exists because certain synergies are efficient, not because other combinations are impossible.
Speaking of character flexibility, resources like IGN’s gaming guides often discuss how roster depth in JRPGs creates replayability, FFVI pioneered this approach, and it’s why the game remains engaging decades later.
Common mistakes to avoid:
- All physical damage: Multiple attackers without healing coverage or magical diversity will struggle against magic-heavy encounters.
- All magic users: AOE damage is great, but you’ll lack physical pressure against enemies with high magical defense.
- Inflexible builds: Teams with only one healer or one damage type become liability in varied encounters. Flexibility is strength.
- Ignoring relics: Equipment and relics amplify character strength more than base stats. Don’t neglect this layer of optimization.
- Not leveling up: Unlike some JRPGs, FFVI expects grinding. Underleveled parties will hit walls no amount of strategy overcomes.
Final note on resources: GameRant’s JRPG content regularly covers character optimization and team building across the Final Fantasy series, offering additional perspective on how FFVI’s character system compares to modern JRPGs.
Team building in FFVI is an art form. Understanding individual character strengths, esper synergies, and relic optimization creates thousands of viable teams. That flexibility is part of why FFVI remains beloved, every player finds their preferred setup, and none of them are truly wrong.
Conclusion
FFVI’s 14-character roster is one of gaming’s great achievements in character design. Each character brings mechanical depth, narrative significance, and personality. Whether you gravitate toward Terra’s identity crisis, Sabin’s martial arts mastery, or Relm’s sketch chaos, there’s something meaningful in every character.
The game’s genius is that it doesn’t force you into any single playstyle. You build your preferred team, discover synergies, and optimize for the challenges you face. That flexibility, combined with the character depth woven throughout the narrative, creates an experience that feels personal to each player.
When you’re planning your next FFVI run, consider not just raw stats and abilities, but what each character brings to your specific adventure. Sometimes the “optimal” team isn’t as memorable as the one you genuinely connected with. And in a game nearly 35 years old that’s still being replayed and discussed, that connection is the real victory.
Whether you’re speedrunning, casual playing, or experiencing FFVI for the first time, understanding your roster’s depth makes the journey richer. Each character has something special to offer, you just need to find what resonates with you.

